从零开始搭建的意思,就是从需求分析,系统规划,设计分析和落地实践几个步骤,从无到有的过程。考虑左右,为了个人学习和提升,选型基于流行的springboot+springcloud,从零开始搭建一套自己用于学习的研发平台。
整体平台的流程,从管理、开发、测试、运维、生产几条线,实现整体平台的落地和管理,下面是整体研发平台架构。

整个研发平台架构设计
整个研发平台产物:https://gitee.com/landonniao
整体研发平台使用的基线规划如下
平台所有基线及所有项目目录结构,整体从零开始进行平台基线搭建及规划,多个基线的规划,考虑更合适多个岗位角色的管理
| 序号 | 基线说明 | 基线地址 | 维护人员 | 状态 | 备注 |
|---|---|---|---|---|---|
| 1 | 平台整体文档目录 | alinesno-cloud-document | 集成中 | ||
| 2 | 平台环境搭建文档记录文档基线 | alinesno-cloud-evn | 集成中 | ||
| 3 | 平台前端规划及页面基础页面设计基线 | alinesno-cloud-pages | 集成中 | ||
| 4 | 平台所有服务列表代码基线 | alinesno-cloud-service | 集成中 | ||
| 5 | 平台前端应用和手机应用代码基线 | alinesno-cloud-application | |||
| 6 | 平台自动化测试基线 | alinesno-cloud-test | |||
| 7 | 平台运维脚本过程产物基线 | alinesno-cloud-operation | |||
| 8 | 平台搭建过程中常见问题基线 | alinesno-cloud-question | |||
| 9 | 开发人员使用平台指引 | alinesno-cloud-guide | 略 |
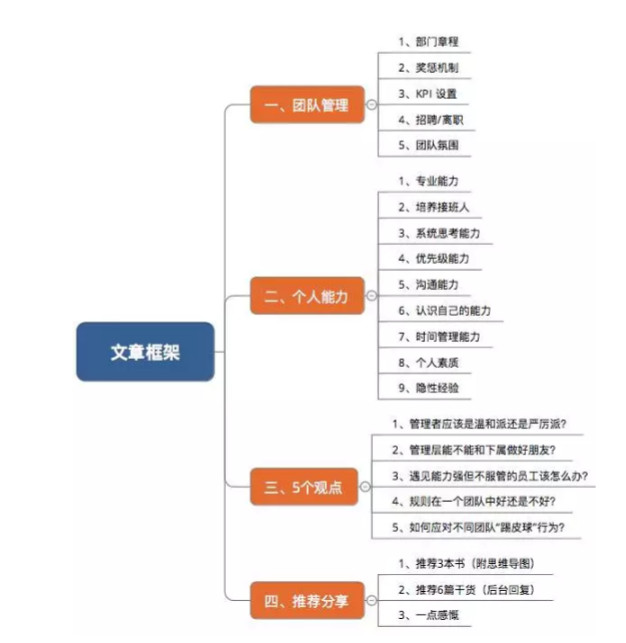
一、个人为什么要搭建一个统一研发平台
1、为了有方向感,不迷茫,不浪费时间,有可行的学习计划
上大学的时候,就开始学习计算机,从基础的Java到Java web,再到框架,再到在学校接一些小项目,如企业网站,兼职网,报名网站等,这几步路大概走了2年左右,而在学完两年之后,人还是很迷茫,方向感还不是特别强,而在找方向和突破迷茫上面,走过了很多弯路,终于找到点方向。后来才发现,很多这个专业的同学,可能毕业几年之后,依然还找不到方向和定位,东学一点西学一点,很浪费时间,可能醒悟的时候,已经过了3~5年,很难再转回头。
2、为了在工作和学习过得中不断积累和提高学习效率
学习和工作的几年里,几乎每个项目,资料,文档,规范都是有共性的,而由于各个项目的不统一,在接收新项目的,几乎都从零开始,一些非功能性需求的建设已经占去了实际项目的很多时间,投入需求建设的时间其实没多少,最简单的,代码的CURD都是一样,自己在做的时候,针对每个项目都有改进,比如这个项目统一了CURD,那个项目梳理出了公共代码,但是项目是分开的,最终新的项目,也是从零开始或者复制,再加上人工,手工,人肉运维,不断的繁琐而简单的工作的学习中无法脱身,影响进入下一步学习。这类似于温水煮青蛙,没有感觉,可能慢慢拖死自己,特别是做项目的前两年,除了数据的添加删除,还是这些。重复开发,无法共用这些都消耗了很长的时间。比如一直想学大数据,但是由于没有好的平台依托,目前还是无法投入学习。
3、为了可以总结和反思,可以不断的打磨出一个平台,一个产品或者一个精品
这几年的工作和学习中,有很多都是在学习,在努力,也很上进,资料有不计其数,但是却在用的时候,没有深入或者精通某一个模块,最常见的,连自己精通的模块都无法界定,不自信,没有自己的深入心得,比较浮在表面上。自己近乎有两年的状态如此,一直在努力,但是却一直没有达到预期的,别人认可的效果,接触的面好像很多,但是却没有哪一样是完全吃透的。最终发现的原因是没有做好总结和复习,反思,一个知识点以为看过了就懂,但是没有结合实际进行提炼与打磨,没有吃透,就往下一个模块,最终导致好像不断的在捡东西,但最终这些东西都不是自己的。所以需要打磨自己的东西,能谈出自己心得,这就是自己的产品,就是自己的精品,或者自己就一个精品。
4、为了扩大自己的视野和学习心态,开放心态
学习中最怕和就是无沟通与交流,没有他人的指点和自己的固步自封,坐井观天等心态,在学得一些技术之后,开始自以为自,然后偏向于安逸。明显,这种心态自己曾经有过,而且持续很长一段时间。这间接造成不管是沟通、技术方面都慢慢出现问题。自己一直相信,心态有多开放,有多宽容,帮助的人越多,自己也才更好的成长,不管是技术还是管理,包括生活等。
二、个人需要搭建怎么样的研发平台来学习
1、可以随时随地的学习,只要有网络和电脑,就可以学习
闲碎的时间常常存在,比如学校上机,看手机,还有一些无聊的聚会,甚至上厕所,这些都要能可以用来学习,网络现在无处不在,有个手机就可以上网,所以这些时间要能充分利用起来。
2、可以好的工具和学习环境
学习过程,工具的成熟度和熟练程度很多时间影响到自己的学习效率。比如vim的配置使用,熟练之后,不管在编辑和代码方面,速度都比一般的操作快得多。还有jenkins,在这个工具上不断的学习和积累,不管是配置和权限,发布,运维,分布式都能很大的帮助,同时节省很多时间。
3、可以不断的学习目标,最好从基础程序员到总监
学习有一个从零开始,到不断往上的过程,并且有目标,知道每个目标阶段需要什么样的技术,能力,成长时间等,做到心知肚明,不浪费多余时间 。可以不断的有学习积累,在积累上由量变到质变
5、可以不断的跟外界沟通交流,避免闭门造车,固步自封
需要不断的与外部学习,获取到外部的建议,看到自己的不足,同时也看到自己的优点。在自己不断学习的过程中,同时不断的成果,并让别人看到,给自己提建议,在自己把自己的思路成果对外贡献的同时,别人也一样帮自己提升。
三、研发平台怎么搭建,搭建到什么样的程度
搭建的思路都是先有一稿,然后再后期慢慢在这一稿上面做好优化,同时参考当前社会主流技术,便于学习。
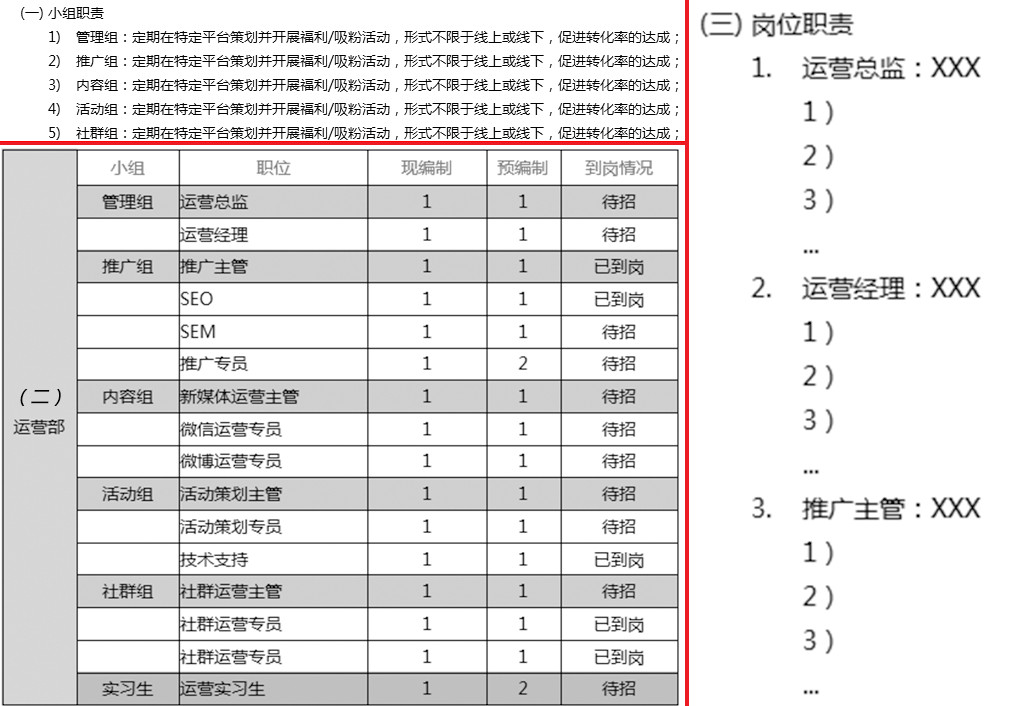
1、制定整体学习规划和学习路线,技术路线和成长规划
平台构建过程中,产生大量的技术产物和管理产物,而在大量的项目过程中,同时也会产生大量的问题导致过程中细节的不完善,人为的不完善及限制,导致平台无法正常管理和运维,开发平台的管理规划即针对整体平台的运维管理进行的建议,以达到管理统一有序,过程明确,产物明确,目标明确等
从需求->准备->组织->开发<->内部测试<->用户测试<->自动测试->生产(试运行)->生产->运维整个流程完善,每个流程中又包括多个工作,如需求管理,同时每个工具必然有一定的产物,如需求管理的产物是需求管理基线和需求文档。
| 序号 | 模块 | 功能 | 产物 | 备注 |
|---|---|---|---|---|
| 1 | 需求 | 需求管理 | 管理基线 | |
| 2 | 需求 | 组织分工 | 需求人员管理表 | |
| 3 | 需求 | 需求变更 | ||
| 4 | 需求 | 需求确认 | 需求文档 | |
| 5 | 需求 | 需求分配 | ||
| 6 | 准备 | 工具准备 | 工具管理文档 | |
| 7 | 准备 | 组织结构 | 人员资源清单 | |
| 8 | 准备 | 环境准备 | 开发基线/文档管理基线 | |
| 9 | 准备 | 资源准备 | ||
| 10 | 准备 | 基线准备 | ||
| 11 | 组织 | 人员资源 | 人员资源准备 | |
| 12 | 组织 | 开发管理 | ||
| 13 | 组织 | 沟通管理 | ||
| 14 | 组织 | 角色分工 | 角色分工及联系沟通表 | |
| 15 | 组织 | 版本管理 | ||
| 16 | 开发 | 开发培训 | ||
| 17 | 开发 | 开发管理 | ||
| 18 | 开发 | 单元测试 | ||
| 19 | 开发 | 开发流程 | ||
| 20 | 开发 | 部署管理 | ||
| 21 | 开发 | 问题处理 | ||
| 22 | 测试(内部) | 内部测试 | ||
| 23 | 测试(内部) | 组织机构 | ||
| 24 | 测试(内部) | 问题反馈 | ||
| 25 | 测试(内部) | Bug管理 | ||
| 26 | 测试(内部) | 接口测试 | ||
| 27 | 测试(内部) | 功能测试 | ||
| 28 | 测试(内部) | 集成测试 | ||
| 29 | 测试(用户) | 业务测试 | ||
| 30 | 测试(用户) | 问题反馈 | ||
| 31 | 测试(用户) | Bug管理 | ||
| 32 | 测试(用户) | 问题反馈 | ||
| 33 | 测试(用户) | 测试报告 | ||
| 34 | 测试(用户) | 版本管理 | ||
| 35 | 测试(自动) | 测试配置 | ||
| 36 | 测试(自动) | 压力测试 | ||
| 37 | 测试(自动) | 安全扫描 | ||
| 38 | 测试(自动) | 功能测试 | 测试报告 | |
| 39 | 测试(自动) | 安全测试 | 安全报告 | |
| 40 | 测试(自动) | 压力测试 | 压力报告 | |
| 41 | 生产(试运行) | 切换计划 | ||
| 42 | 生产(试运行) | 工单管理 | ||
| 43 | 生产(试运行) | 账号管理 | ||
| 44 | 生产(试运行) | 安全管理 | ||
| 45 | 生产(正式) | 运维监控 | ||
| 46 | 生产(正式) | 工单管理 | ||
| 47 | 生产(正式) | 日志管理 |
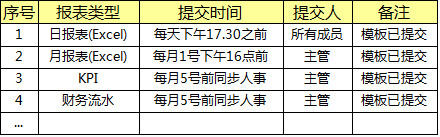
为达到以上的要求,也为了过程有记录和沉淀,考虑一些必要性的管理工具,暂时考虑以下几个工具:
| 序号 | 说明 | 技术 | 版本 | 备注 |
|---|---|---|---|---|
| 1 | 文档管理 | GitBook | 企业内部做好考虑,团队未必每个人都能接受markdown | |
| 2 | Wiki管理 | GitBook | 企业内部做好考虑,团队未必每个人都能接受markdown | |
| 3 | 开发过程管理 | Jira | ||
| 4 | 开发工具管理 | 百度网盘 | 公司内部建议使用FTP或者内部文件系统 | |
| 5 | 邮件通知 | 163邮箱 | 建议使用企业内部邮箱 |
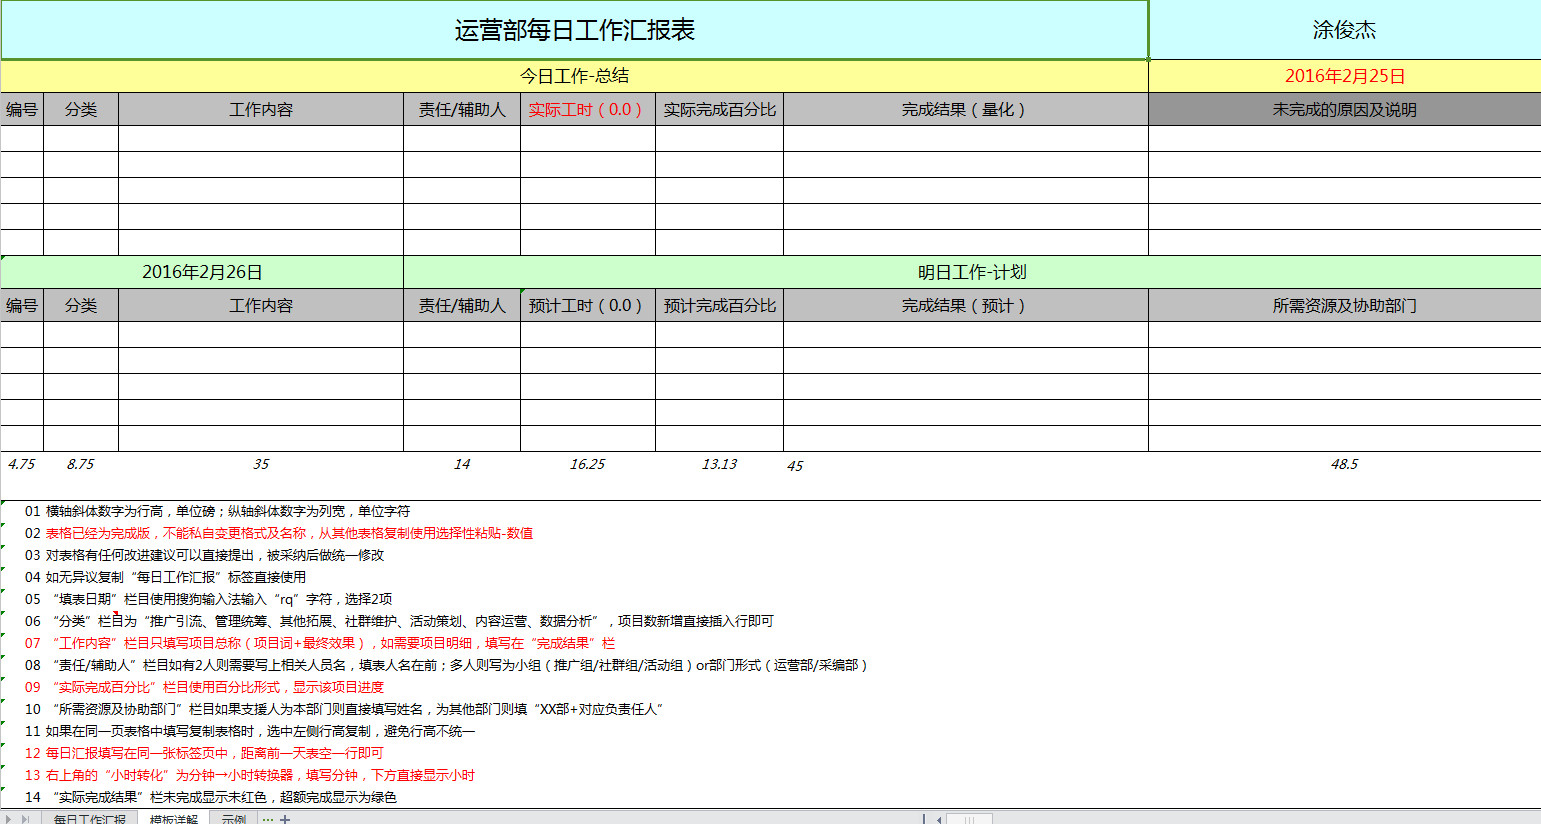
以下为文档管理基线示例

2、制定持续集成环境,为学习提供基础的准备和提升效率
持续集成他一套比较成熟的自动化研发解决方案,使用也有几年时间,不同的人有不同的设计,有些可能只是发布工程,这里针对于需求、开发、测试、文档、运维几个维度,进行了整合,同时也制定和管理方案,以达到基础规范 – 组织结构 – 基础架构 – 业务开发 – 持续集成– 自动化部署 – 自动化测试 – 生产运维监控 – 在线升级 几个方向自动化,这里不得不提一下Jenkins+git,确实是整个自动化的核心。目前考虑了一下这些工具,针对于开发的:
| 序号 | 说明 | 技术 | 版本 | 备注 |
|---|---|---|---|---|
| 1 | 代码管理 | Git(gitee) | 2.17.1 | 企业内部建议使用gitlab(更能满足需求) |
| 5 | 代码管理客户端 | SourceTree | 2.7.6 | |
| 2 | 自动部署工具 | Jenkins | 2.107.1 | 不建议使用太新版本 |
| 3 | 私服库 | Nexus | 2.14.1 | 不建议使用3.x版本 |
| 3 | 构建工具 | Maven | 3.6.0 | |
| 4 | 代码检测 | Sonar | 5.x | 不建议使用太新版本 |
| 5 | 镜像管理 | Harbor | 1.5.2 | |
| 6 | 镜像容器 | Docker | 1.12.1 | |
| 7 | 容器管理 | Kubernetes | 1.10 | 不建议使用太高版本,跟着社区走 |
自动化持续集成的效果如下:

文档持续集成效果如下:

3、下载和整理软件工具,整理软件工具版本
基础环境完善及配置,为整个开发平台做基础,以环境搭建为主,为本地开发环境。
使用的阿里云服务器规划如下:
| 序号 | 作用 | 服务器资源(系统/内存/硬盘) | IP规划 | 备注 |
|---|---|---|---|---|
| 1 | 开发服务器_master | CentOS7.4_x64_4G_40G | 192.168.1.110 | |
| 2 | 开发服务器_slave | CentOS7.4_x64_2G_40G | 192.168.1.111 | |
| 3 | 开发服务器_slave | CentOS7.4_x64_1G_40G | 192.168.1.112 |
规划的使用工具如下:
| 序号 | 说明 | 工具 | IP | 是否集群 | 文档完善进度 | 备注 |
|---|---|---|---|---|---|---|
| 1 | 基础环境 | JDK | 172.18.11.17 | 单点 | 已完善 | |
| 8 | 反向代理 | Nginx | 172.18.11.17 | 单点 | 已完善 | |
| 11 | 自动部署工具 | Jenkins | 172.18.11.17 | 单点 | 完善中 | |
| 12 | 私服库 | Nexus | 172.18.11.17 | 单点 | 已完善 | |
| 17 | 链接跟踪 | skywalking | 172.18.11.17 | 单点 | ||
| 13 | 代码检测 | Sonar | 172.18.11.17 | 单点 | ||
| 2 | 缓存工具 | Redis | 172.18.11.17 | 单点 | 已完善 | |
| 4 | 消息列表 | Kafka | 172.18.11.17 | 单点 | 已完善 | |
| 10 | 分布式注册中心 | zeekeeper | 172.18.11.17 | 单点 | 完善中 | |
| 6 | 分布式注册中心 | Eurake | 172.18.11.139 | 单点 | ||
| 10 | 分页式配置中心 | Apollo | 172.18.11.139 | 单点 | ||
| 6 | 数据库 | MySQL | 172.18.11.139 | 单点 | 已完善 | |
| 1 | 开发过程管理 | Jira | 192.168.1.120 | 集群 | ||
| 3 | Redis监控工具 | Redmon | 192.168.1.119 | 单点 | ||
| 5 | 消息管理工具 | Kafka-Manager | 192.168.1.119 | 单点 | ||
| 7 | 数据库主从 | MyCAT | 192.168.1.111/112 | 集群 | ||
| 7 | 容器管理 | Kubernetes | 192.168.1.1110/111/112 | 集群 | ||
| 9 | 高可用 | KeepAlived | 192.168.1.110/111/112 | 集群 | ||
| 14 | 镜像管理 | Harbor | 192.168.1.110 | 单点 | ||
| 15 | 自动部署 | Ansible | 192.168.1.119 | 单点 | ||
| 16 | 自动部署管理 | Ansible Tower | 192.168.1.119 | 单点 | ||
| 17 | 链接跟踪 | pinpoint | 192.168.1.119 | 单点 | ||
| 18 | 日志监控 | elk | 192.168.1.119 | 集群 | ||
| 19 | 服务器监控 | Zabbix | 192.168.1.119 | 单点 |
工具的保存是放在百度云上面:

4、规划平台非功能性需求组件,包括基础组件等
功能重用,组件重用,目前最好的技术承载就是微服务了,这也是这几年才出现,这样规划研发平台构架,对我而言,微服务架构自然成为不二的选择(后面的中台业务也是在微服务上进行进程创建)
服务设计原则
服务单库设计,以减少迁移,服务之前影响等;
基础服务只为调用设计,位于服务的底层或者中间层,基础服务禁止调用业务服务;
业务服务调用基础服务,或者其它服务,业务服务为服务的顶层,用于定制化业务;
同一级服务之间可以互相调用,只能自下往下调用,平级调用,禁止自下往上调用,以避免服务混乱及维护混乱。
每种服务目录按999个服务规划
服务设计规划
| 类型 | 目录名称 | 说明 | 备注 |
|---|---|---|---|
| 教程 | 示例服务 | 做示例工程,包含有所有服务调用示例 | |
| 前端应用 | 门户服务 | 与中台服务同级,用于统一门户服务 | |
| 前端应用 | 应用服务 | 前端应用或者手机应用 | |
| 网关应用 | 网关服务 | 对外网关服务,与平台组件同级,但仅做为网关部分 | |
| 中台服务 | 中台服务 | 服务于前端应用,处理业务,可以服务之间互相调用,或者调用基础服务 | |
| 基础服务 | 基础服务 | 公用基础组件,只能被调用或者调用公共或者组件包,不能主动调用其它服务 | |
| 基础服务 | 公共服务 | 基础公共包,所有工程的基础,包括配置,页面,核心包等 | |
| 基础服务 | 组件服务 | 基础组件包,用于第三方等,组件包不能单独运行,只能被依赖 | |
| 运维环境 | 监控服务 | 监控平台,用于运维平台,目前仅规划,有可能与平台服务合并一起 | |
| 运维环境 | 平台服务 | 包括注册中心,配置中心等 |
工程目录规划
关于命名方向,一直不知道用什么名字比较合适,所以使用自己网站的域名。
| 序号 | 目录名称 | 目录规划 | 端口规划 | 权限 | 备注 |
|---|---|---|---|---|---|
| 1 | 公共服务 | alinesno-cloud-common | 研发 | ||
| 2 | 组件服务 | alinesno-cloud-component | 研发 | ||
| 3 | 平台服务 | alinesno-cloud-platform | 24000+ | 研发 | |
| 4 | 基础服务 | alinesno-cloud-base | 25000+ | 研发 | |
| 5 | 业务服务 | alinesno-cloud-business | 26000+ | 开发 | |
| 6 | 门户服务 | alinesno-cloud-portal | 27000+ | 研发 | |
| 7 | 网关服务 | alinesno-cloud-gate | 28000+ | 开发 | |
| 8 | 应用服务 | alinesno-cloud-web | 34000+ | 开发 | |
| 9 | 监控服务 | alinesno-cloud-monitor | 35000+ | 研发 | |
| 10 | 示例服务 | alinesno-cloud-demo | 30000+ | 研发 | 置于guide基线 |
5、提取出业务中台规划,并完善组件,打磨中台业务产品
上面也提到,业务中台也是在微服务上面构建,设计原则加上了几个点,分别如下:
按“重中台”+”轻应用”设计,业务应用逻辑思路放在前端应用,推荐是尽量减少或不拆分前端服务;
重中台的建设,在于前端应用共性部分的抽取和后期的沉淀,形成中台业务服务;
中台服务调用基础服务,或者其它同级服务,中台服务为服务的中层,用于业务共性(共享)抽取;
整体中台的业务架构如下:

中台业务建设目标如下

6、统一和通用的权限配置系统和界面设计
这个就是通用的,只需要在配置平台添加好菜单,分配好账号权限,本地开发只需要账户就可以进行本地开发,配置平台包括的一些功能规划如下:
应用管理:用于配置系统应用,添加和删除管理。
用户管理:用户是系统操作者,该功能主要完成系统用户配置。
部门管理:配置系统组织机构(公司、部门、小组),树结构展现支持数据权限。
岗位管理:配置系统用户所属担任职务。
菜单管理:配置系统菜单,操作权限,按钮权限标识等。
角色管理:角色菜单权限分配、设置角色按机构进行数据范围权限划分。
字典管理:对系统中经常使用的一些较为固定的数据进行维护。
参数管理:对系统动态配置常用参数。
通知公告:系统通知公告信息发布维护。
操作日志:系统正常操作日志记录和查询;系统异常信息日志记录和查询。
登录日志:系统登录日志记录查询包含登录异常。
在线用户:当前系统中活跃用户状态监控。
定时任务:在线(添加、修改、删除)任务调度包含执行结果日志。
代码生成:前后端代码的生成(java、html、xml、sql)支持CRUD下载 。
然后大概的设计如下:

开发人员的开发流程如下:

7、完善软件组件辅助,包括测试、运维、环境管理
以上组件的搭建过程,如果一个人管理,会产生很多问题,同时延伸出其它方向的建设,其中包括最基础的服务器管理和服务预警方向,安全策略管理,平台整体入口和常用文档,功能,平台组件的质量保证,即运维、机房环境,测试这几块。在建设统一研发平台的同时,也自然包括建设这些内容,大概做了一些建设工作,以下为一些设计的示例。
机房服务器管理系统

平台统一门户管理

其它的建议,如包括人才培养,大数据,人工智能,项目管理,都是在研发平台中慢慢积累和培养的产物,而最终的结果是为了整理出一套完整的企业统一研发平台。
四、总结
以上为目前搭建整体个人整体研发平台的思路和设计,一个优秀的研发人员的工作并非只是编制代码,更多的是自己能做什么,完成什么,有什么价值,能帮别人做什么。